Mount and connect cylinder head and solenoid valve for capacity control
Authorized staff
All work done on the products and the systems in which they are or will be installed may only be performed by qualified and authorised staff who have been trained and instructed in all work. The qualification and competence of the qualified staff must correspond to the local regulations and guidelines.
Clean the sealing surface on the valve plate
- Rags and cloths
Put gasket with metallic support onto CRII cylinder head
Use screws as shown in the video!
The cylinder head bolts are different lengths!
Use screws as shown in the video!
Risk of incorrect assembly!
Install CRII cylinder head with gasket with metallic support
Screw on CRII cylinder head hand-tight
Use screws as shown in the video!
The cylinder head bolts are different lengths!
Use screws as shown in the video!
Risk of incorrect assembly!

- 17 mm socket spanner
Clean sealing surface on the flange
- Rags and cloths
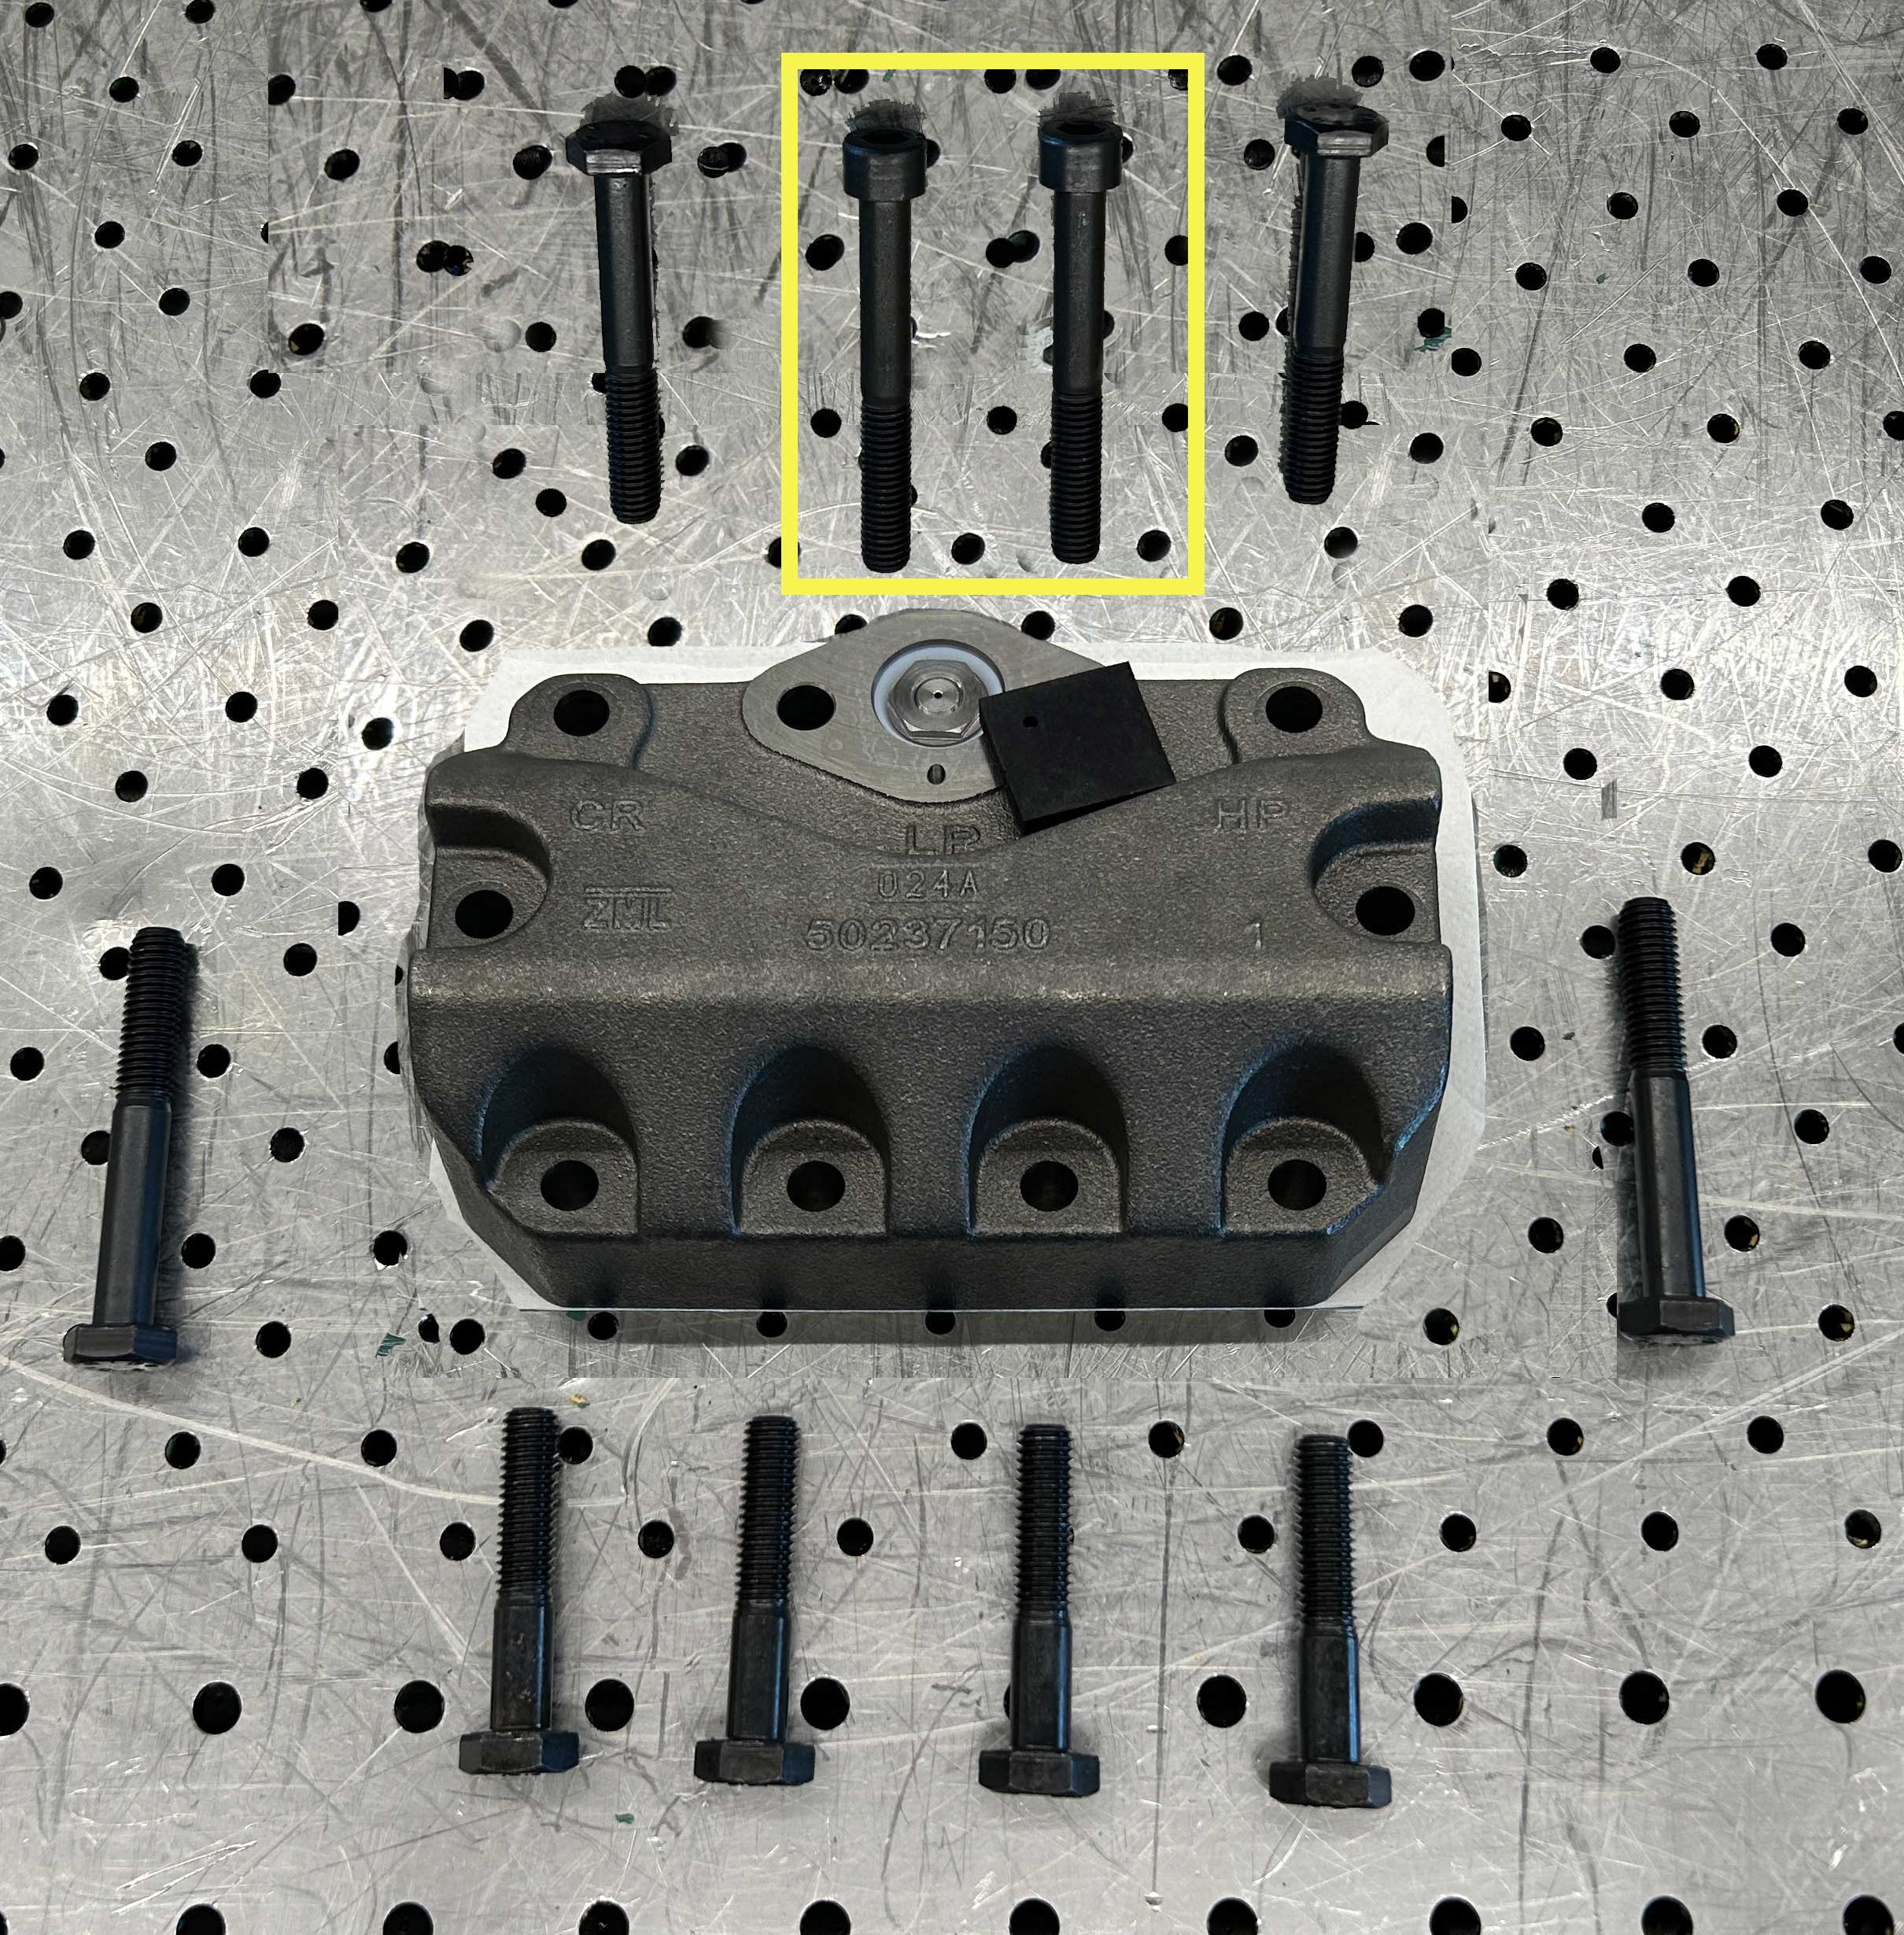
Screw the solenoid valve with seal to the flange
Use the marked screws for this:
- 8 mm hexagon socket spanner
Mount cylinder head with solenoid valve for capacity control
When turning or mounting shut-off valves with flanges:
Risk of damage to the compressor.
Tighten screws crosswise in at least 2 steps to the prescribed tightening torque.
Test tightness before commissioning!
- 8 mm hexagon socket spanner
- 17 mm soeckt spanner
- Torque spanner
- Tightening torque: 80 Nm
Place seal on electric connector of the device
Screw electric connector of the device to the solenoid coil
- Cross head screwdriver size 2
- Tightening torque: handtight
Place solenoid coil onto armature of the solenoid valve
Connect cable cores "CR1" to terminal strip CN20 and screw the protective conductor to the earthing terminal strip
- Slotted screwdriver
Terminal strip CN20, terminal 7: BROWN: "D04"
Terminal strip CN20, terminal 8: BLUE: "N"
- Cross head screwdriver size 2
Connect protective earth conductor to earthing terminal strip
Connect cable cores "CR2" to terminal strip CN21 and screw the protective conductor to the earthing terminal strip
- Slotted screwdriver
Terminal strip CN21, terminal 1: BROWN: "D05"
Terminal strip CN21, terminal 2: BLUE: "N"
- Cross head screwdriver size 2
Connect protective earth conductor to earthing terminal strip
Kabelverschraubungen im Anschluss schließen.