Mounting and maintenance

Damage possible due to improper combination of coupling and compressor.
Use only original Bitzer couplings.
Follow the mounting instructions in the respective operating instructions of the compressor and observe its application limits according to the Bitzer Software.
Mounting
For mounting, the bores of the coupling halves and shafts can be coated with MoS2 mounting paste.
If necessary, the coupling halves can be heated up to 150°C - protect adjacent components from damage and heating >80°C beforehand, and remove the elastomer elements before heating >80°C!
Alignment
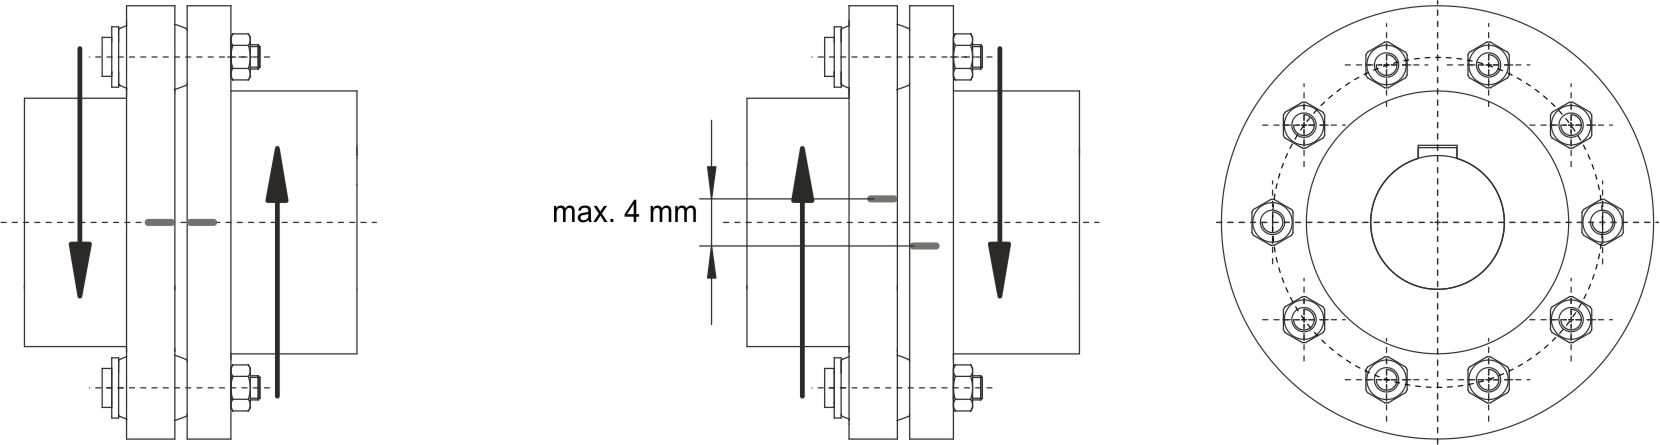
The Bitzer coupling housings facilitate alignment of the coupling so that the shafts of compressor and motor lie on an ideal axis (as far as possible). Even with the coupling housing, however, the axial misalignment remains, i.e. the distance between the coupling halves ("gap dimension"). It must be 2 .. 5 mm.
Screwed connections in elastomer elements
Use screws of strength class 8.8. Tightening torque:
- KS620 .. 900: 30 Nm (width across flats of the external hexagon socket: 17 mm)
- KS1000: 55 Nm (width across flats of the external hexagon socket: 19 mm)
Check the elastomer elements after run-in period and then annually during operation, for details see SW-110. Replace all elastomer elements if the torsional backlash (i.e. the distance according to the following figure) exceeds 4 mm.
Detailed mounting instructions from the manufacturer are available here. Please note, however, that the Bitzer couplings do not match the types mentioned there, but differ e.g. in dimensions.